Pantry Organizing Storage Solutions
Smart Storage Solutions — Tips from a Professional Organizing Consultant and Interior Designer
If there were an award for pantry organizing, this pantry would win it. Not just because it looks beautiful and tidy, but because it genuinely inspires you to cook from wholesome, quality ingredients. This client comes from a culture rich in spices, legumes, and ingredients I had never encountered before. She was already quite organized and owned a lovely collection of jars for storing her ingredients, but the overall function needed some improvement. The goal was to give everyone in the household a clear overview of what's available and easy access to the items used every day. I also thought carefully about how to ensure those special international ingredients, treasures brought back from travels would actually be used before their expiration dates. Everything was organized to inspire cooking, with healthy options placed at eye level so they're the first thing you reach for, before the boxes of salty and sweet snacks tucked away on the top shelf.
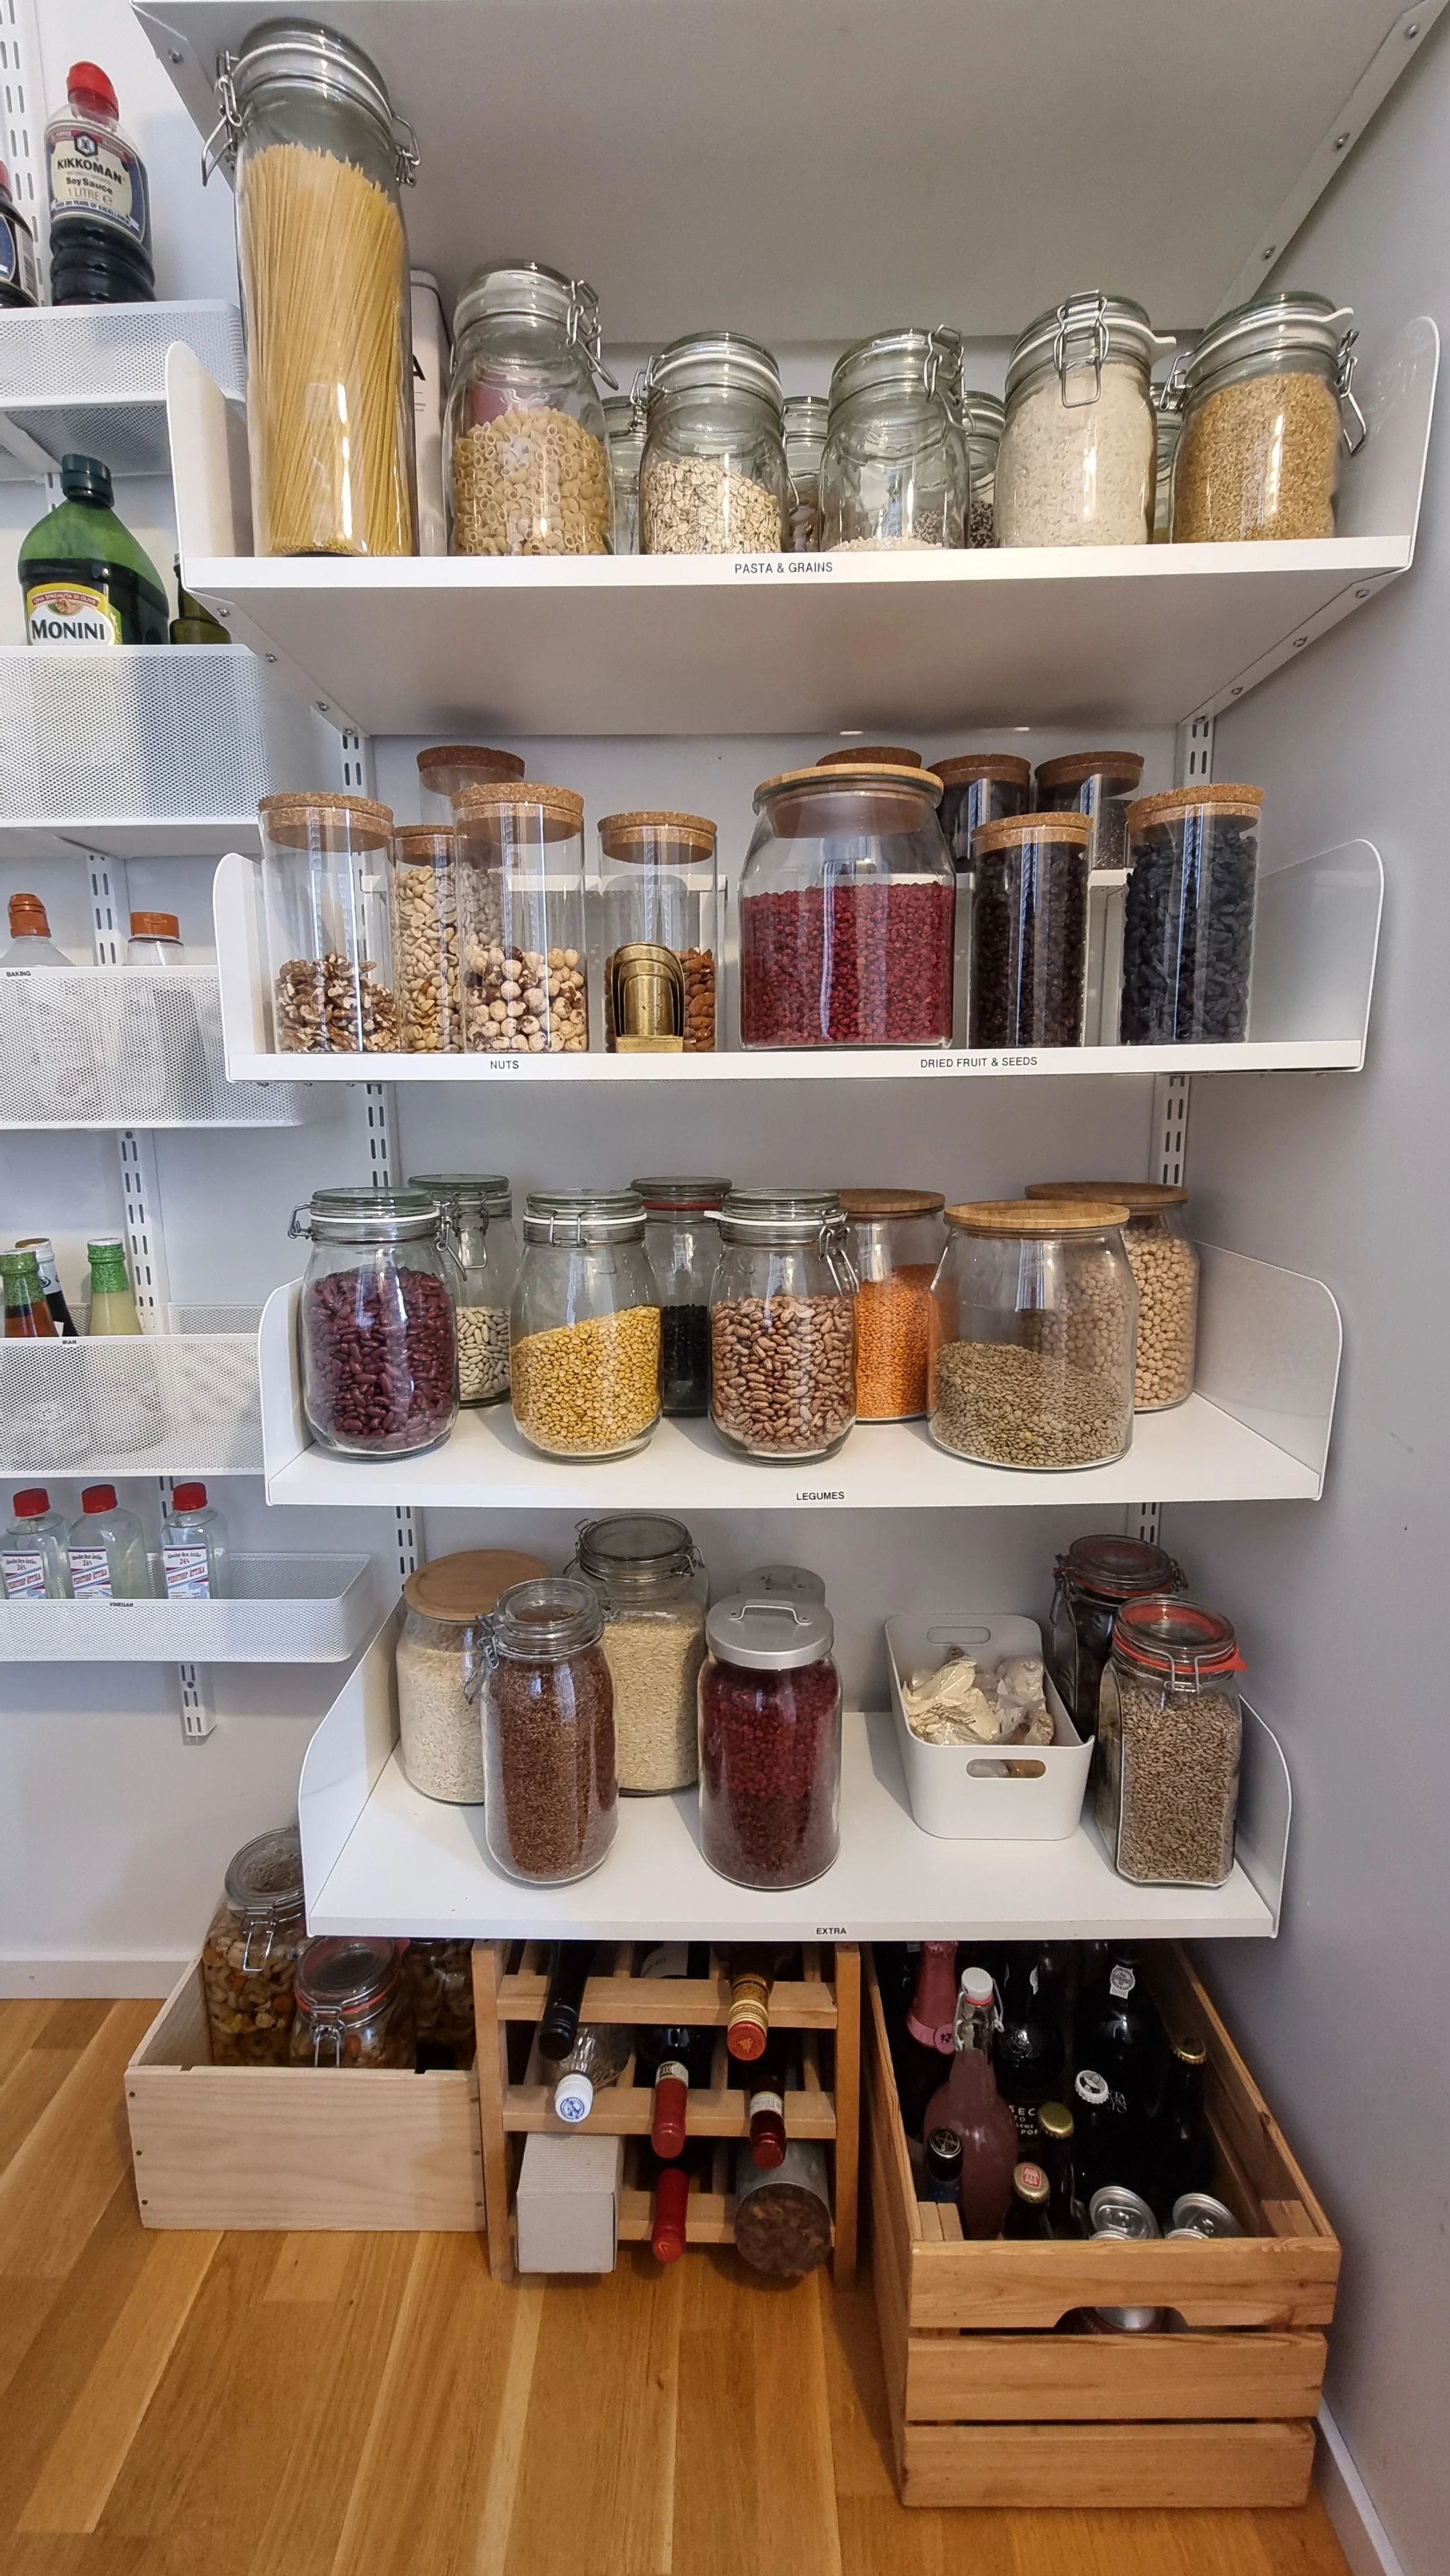
Shelf System Design
As an interior designer, the first thing I do when I look at a pantry is assess whether the shelves are distributed to make the most of the available space. The priority is having enough shelving at an ergonomically comfortable height, not too high, not too low, for the items you reach for every day. You want to walk in, see everything at a glance, and grab what you need effortlessly. This is not a sponsored post, but I genuinely recommend Elfa storage solutions for their exceptional space optimization, especially in smaller pantries. I love not only their shelves but also their narrow Elfa storage baskets , which are perfect for storing bottles of cooking and baking liquids.
Analyzing Food Categories
One of the great privileges of being an organizing consultant is meeting clients from all over the world and getting a peek into their kitchens and pantries. It's fascinating to discover ingredients from different culinary traditions and a wonderful opportunity to learn. I always take a close look at who my clients are: where their food comes from, what their lifestyle looks like, and what their goals are. Some want to eat more healthily, others want to start using certain ingredients they've been curious about. The pantry should be a place of inspiration for the way you want to nourish yourself and your family. As a general rule, healthier everyday options belong at eye level, while less used items- seasonal baking supplies, pickling ingredients, sweet and salty treats can live on the shelves you don't need to reach every day.
Think About Ergonomics
Once your shelves are in the right place, start by clearing out anything expired. Then analyze your food by category and begin placing the most frequently used ingredients at the most accessible height. These items are best stored directly on open shelves, not hidden in boxes - so you always have a clear view of what you have and what needs restocking. This works especially well for canned goods and food stored in glass jars.
Breakfast Area
This tends to be everyone's favorite zone: nut butters, bread, granola, spreads. Create a dedicated breakfast area where everything is grouped together, easily accessible, and arranged in a way that gives you that lovely hotel breakfast feeling on a busy morning. Use warm wooden baskets or woven storage for a cozy touch. Spreads and jars can be kept in a small portable box that can be carried straight to the kitchen table and just as easily returned to the pantry afterward.
Be Inspired
As an organizing consultant, I see firsthand what people tend to throw away during the decluttering process. More often than not, it's those special ingredients brought back from travels or picked up on a whim at a specialty store- full of potential, then forgotten at the back of a shelf. When you bought them, you wanted to experiment. But life gets busy and it's easier to stick to what you know. Move those ingredients to eye level, right alongside your daily staples, and watch your cooking become a little more interesting. You'll use them and you'll thank yourself for it :-)
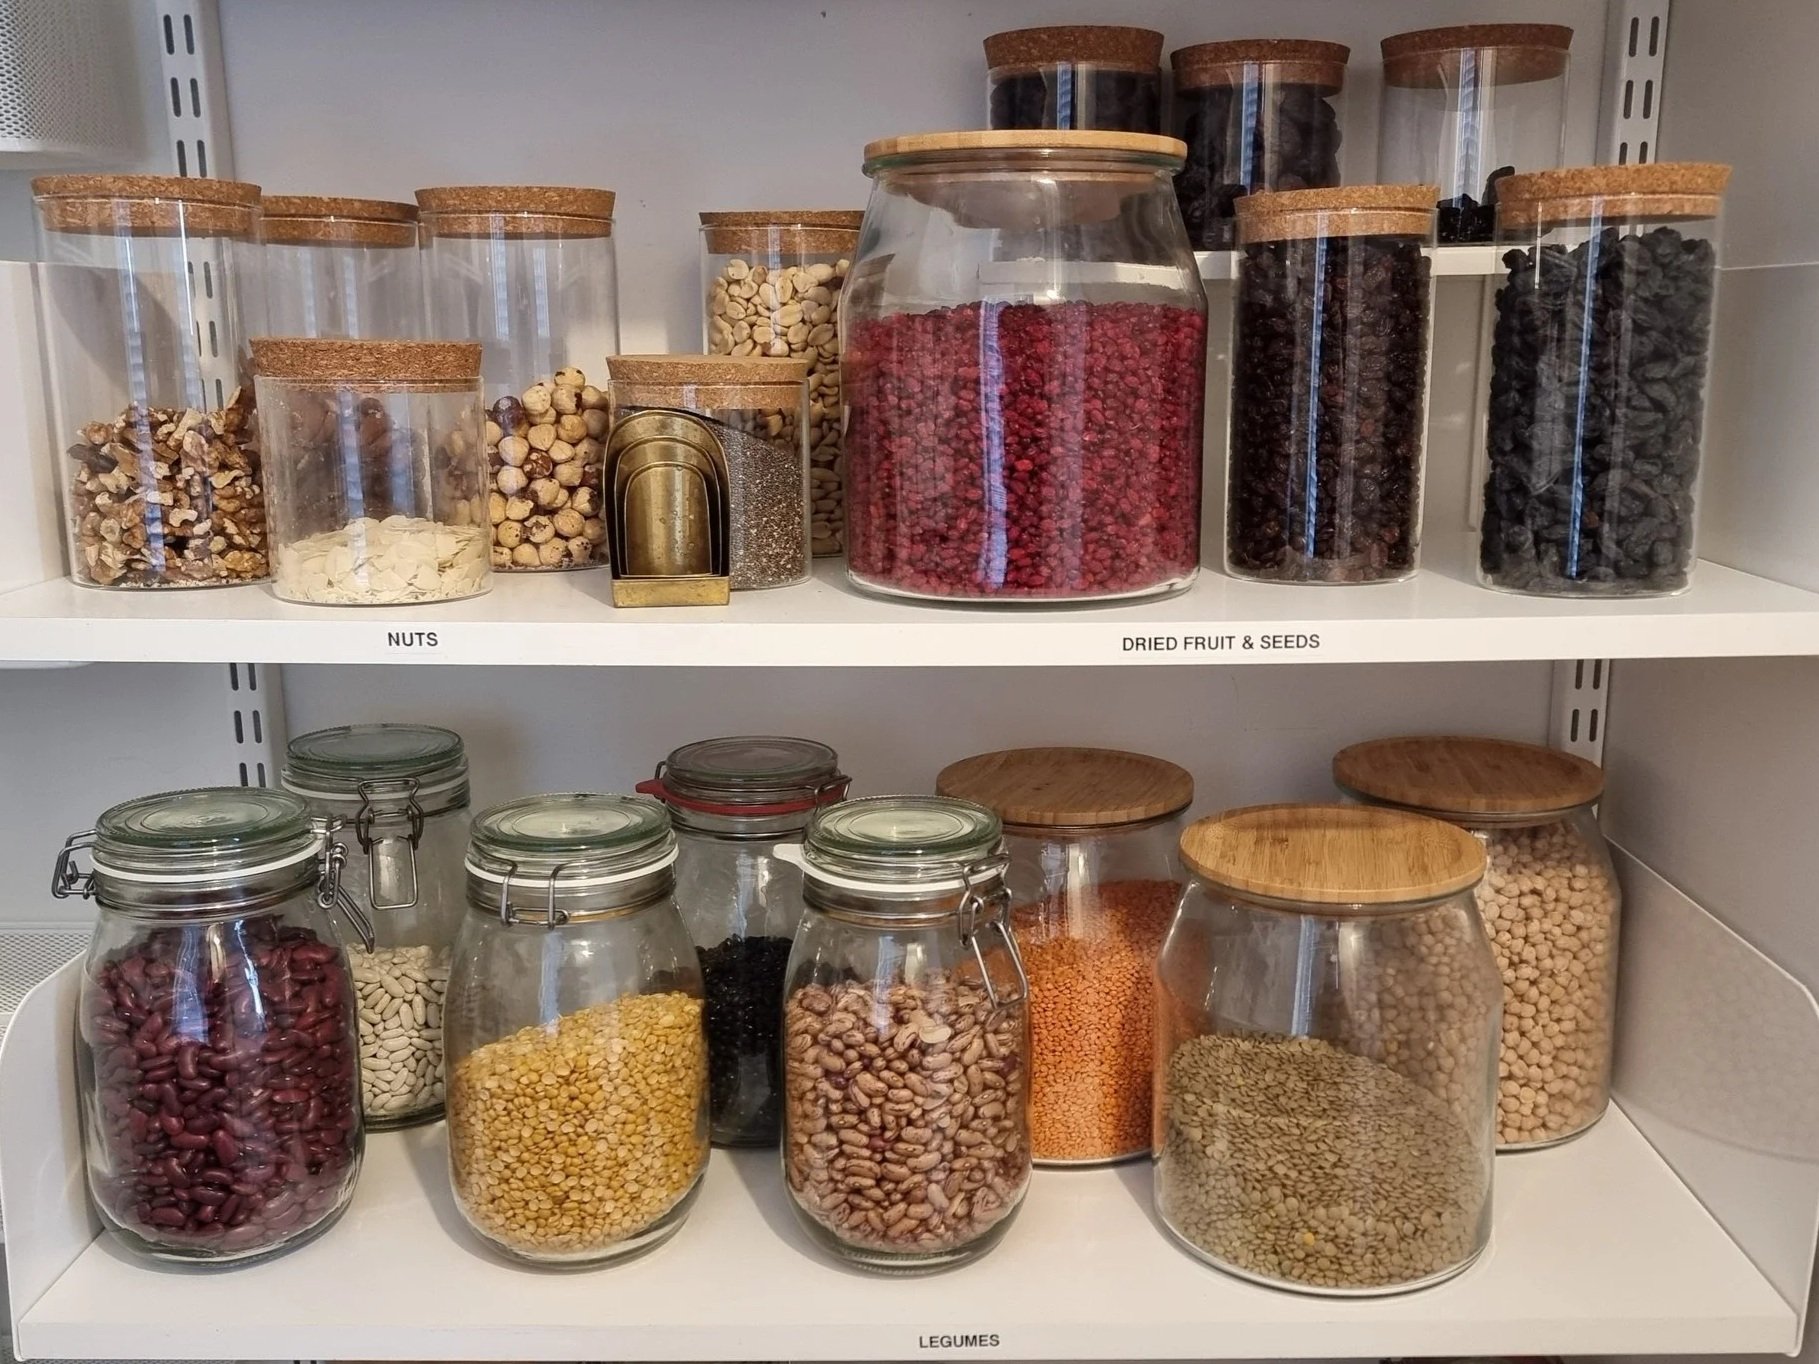
Glass Jars
Transferring dry goods to glass jars completely transforms the experience of cooking at home. Not only do they extend shelf life, but the visual beauty of a well stocked jar collection gives you a real cooking show feeling in your own kitchen. Seeing lentils, grains, pasta, nuts, seeds, and dried goods at a glance makes it far more tempting to cook from scratch. For deep shelves, use a lazy Susan or small shelf risers to bring jars at the back into view.
A few practical tips: cut the expiration date label from the original packaging and stick it to the bottom of the jar. Keep scissors and tape inside the pantry to make this easy. Later, once you're using dry ingredients regularly, you'll likely know intuitively how long things keep. Good sources for affordable, consistent jar designs include IKEA and CLAS OHLSON both tend to keep the same styles in stock long-term, so you can build a matching collection over time. Choose airtight jars for anything moisture-sensitive. Look for jars that are lightweight, easy to open, and flat on all four sides rather than round, as they stack more efficiently and maximize shelf space. For large quantities like rice, use one medium jar for current use (at the most accessible height) and a larger jar for the rest of the bag, to protect the opened portion (this one store in lower shelf). For onion and garlic, choose an opaque jar to keep them fresh in the dark.
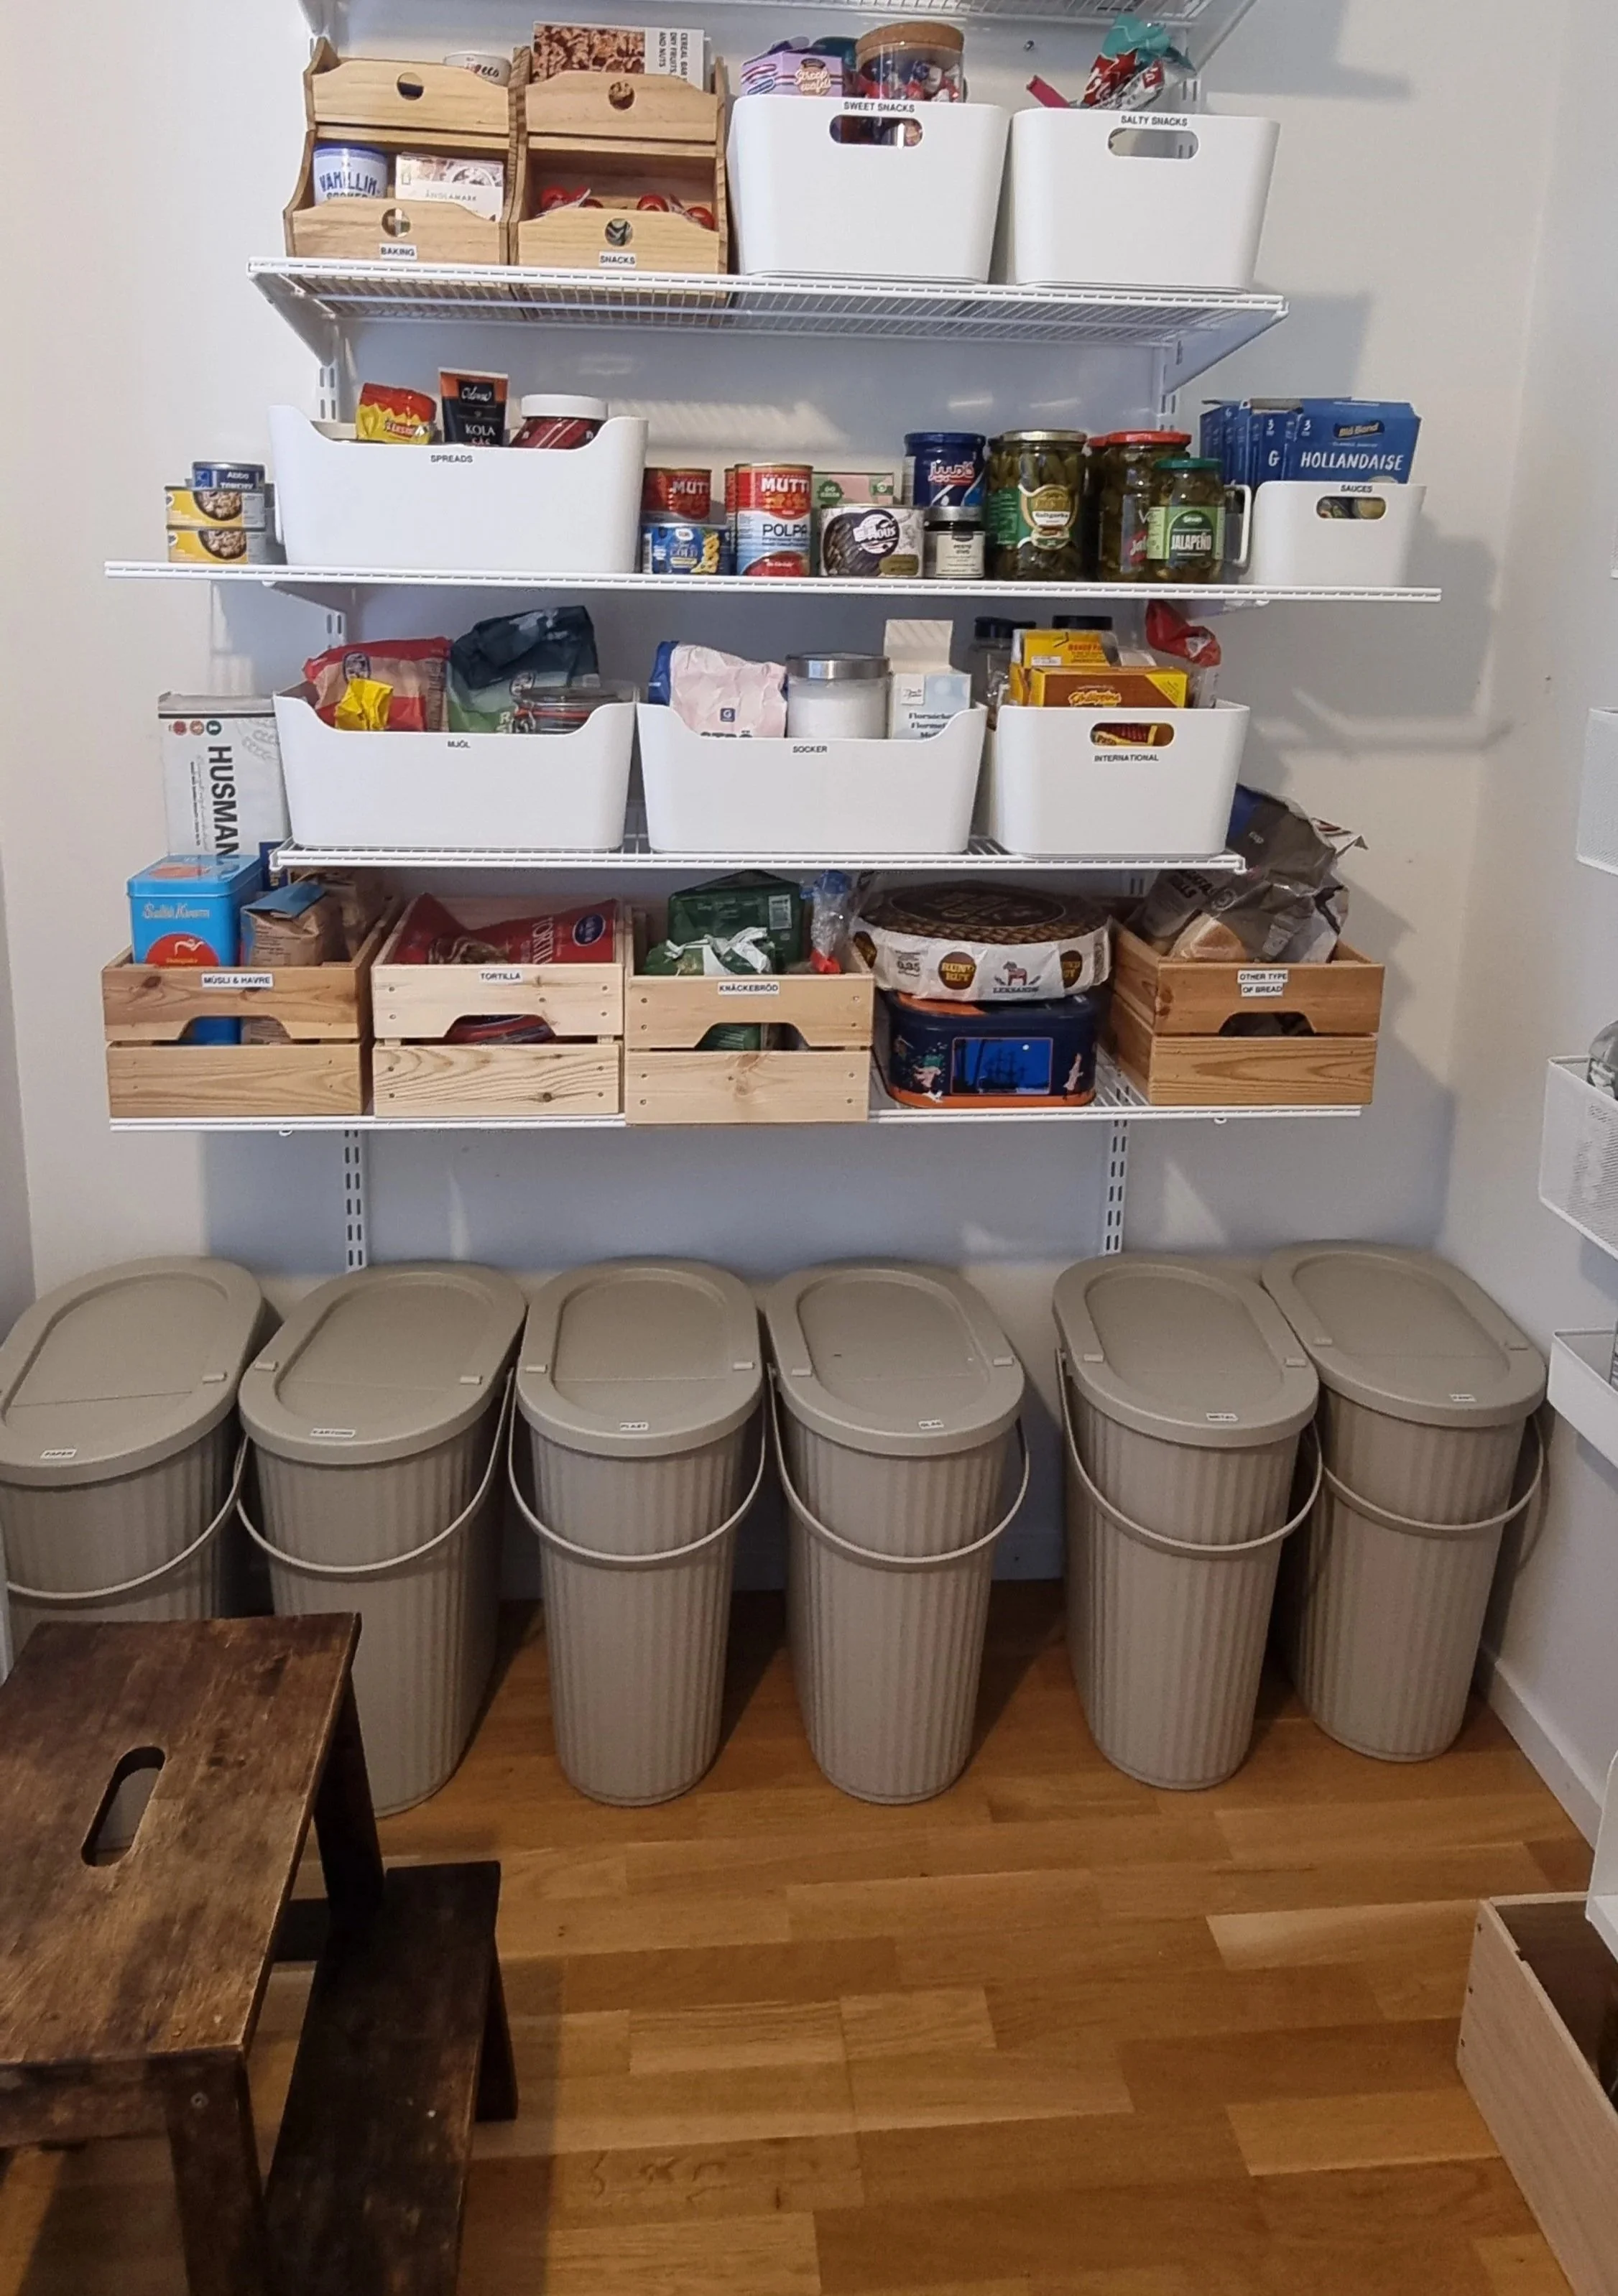
Storage Boxes
Everything that isn't stored in glass jars or cans at eye level should be kept in lightweight boxes on higher shelves. On the floor, wooden boxes work well — sturdy and practical for heavier items like bottled drinks, canned beverages, or heavy jars of pickled food. For higher shelves, choose light baskets or plastic boxes. I'm a big fan of IKEA´s Uppdatera boxes - they have one lower side that gives you a better view of the contents, and if you store them with the narrow end facing out, they remain very easy to use. They're great for snacks, seasonal ingredients, and packaging bags kept for jar refilling.
Labeling
When working with an organizing consultant, we typically use a label printer to create a clean, consistent system that's easy for the whole household to maintain. If you're organizing on your own, investing in a quality label maker is well worth it. Clear, easy-to-read labels make a real difference in keeping the system functional over time.
Recycling
A well designed recycling station makes sustainable habits easy for the whole family, including young children. Invest in clearly labeled recycling bins, sorted by material type, and place them where everyone can access them. Using pictures alongside text on labels is especially helpful for little ones learning the recycling routine.
Step Stool
Since the top shelves are reserved for light items- extra paper towels, dried herbs, mushrooms in jars — make sure a step stool lives inside the pantry, ready to use whenever you need it. It's a small detail that makes a big difference in keeping everything accessible.
I hope this guide inspires you to tackle your pantry this spring — to rethink both its design and its organization. If you're in the Skåne area, you're also welcome to contact me for a personal organizing session. I look forward to hearing from you.